Saturday, November 9, 2013

Look what WE did with a leaf!

 
We checked out this fun book from the library and had a great time getting creative with leaves! Look What I Did With a Leaf  by Morteza E. Sohi is an excellent book that teaches about the different types of leaves and the do's and don'ts of creating art with leaves. It even has a field guide to help identify the leaves you collect!
First, we read the book together. Then we went on a walk around our neighborhood and collected all kinds of leaves of different shapes, colors and sizes. We made sure to take the book with us so we would not forget the types of leaves we needed for the animals we really wanted to make. When we got back home we cleaned the leaves that were dirty. Then we got busy! The boys each made the cute little turtles and then they helped me make the butterfly and elephant. All we used were leaves and Elmer's glue.
The book has so many pictures and ideas of other animals you can make. It was a perfect fall activity.


Monday, August 26, 2013

Small Lightbox DIY

What a fun, functional, educational and perfect "toy" for kids! These lightboxes are so versatile and can be used to teach little ones endless subjects in a new and engaging way. I've seen lots of different  DIY lightbox tutorials online lately. I decided to take ideas from many different ones and make my own. You can make them any size you'd like, but these individual sized boxes are perfect for little hands and can be very easily stored. Plus it helps minimize the arguing and maximize the fun! :) 
 
What You'll Need (I found most of my supplies at the Dollar Tree!)
A clear plastic box with a lid
a push light with batteries
Foil
mod podge
white tissue paper (if the bottom of the box you buy is not already opaque)
Various see-through items to play with such as: craft stones, beads, clear colored page dividers, cups, xray printouts, etc.


I drew letters, numbers and shapes on the backs of these craft stones with a permanent marker.

We sorted in many different ways.
 
Directions:
 
Using mod podge, line the sides and inside of the lid with aluminum foil.
Line the bottom of the container with a single layer of white tissue paper if your box is not already opaque.
Turn on the pushlight and turn the box upside down so the light shines through the tissue paper and play in a dark room.

 
The fun is endless with the lightbox! I used the clear dividers to cut out letters and shapes. My sister has even printed out x-rays onto clear overheads. And a great part about this project is that you can store all the supplies in the box until your little ones are ready to play again!


Wednesday, August 7, 2013

Watch Them Grow!

We made a trip to the Dollar Tree as a reward and the little ones picked out these toys. They are toys you soak in water for 3 days and they gradually "grow". I've decided to turn it into a lesson on measuring. They were excited to see them grow a little over night! Take a trip to the Dollar Tree! It's my favorite store:)

Wednesday, July 24, 2013

Popsicle Paints

Here is a fun twist on paints. Perfect for hot summer days! Use popsicle molds to freeze colored water. I used three drops of food coloring for each "popsicle." Make sure to have real popsicles on hand for your little ones when you do this activity. You don't want them to be disappointed since these popsicles are not meant to be eaten.


Monday, July 1, 2013

Messy Play Date

This is a great summer activity. We had a messy play date! Ours consisted of the following stations:

Colored water mixing station:
Use recycled plastic jars and containers for mixing. I used recycled honey bears filled with water and food coloring. Kids were able to mix the colors to make new ones. It was fun!
 Water Table: 
 Cornstarch Paint Finger Painting:
Line the fence with art paper. Mix several bowl of corstarch, water, and food coloring. 
 Shaving Cream Slip n Slide:
Three cans of cheap shaving cream and a slip and slide did the trick. 


We also had a bubble machine and a fun sprinkler going. 

Perfect for when the weather is warm! 

Thursday, June 27, 2013

Little Pintesters:Foil Painting

This activity can be found here.
http://picklebums.com/2011/08/30/easy-art-for-kids-painting-on-foil/

It's been a while since we've done a "Little Pintesters" post. These are special posts where we will test activities we have pinned on Pinterest. Today we painted on foil! It was actually fun for both my 2 year old and 5 year old. I give it a score of 10. It's not much different than regular painting but for some reason painting on foil gives it an added element of fun!

Score: 10 out of 10

Thursday, June 6, 2013

Sticky wall

You can find a bunch of ideas on Pinterest for this activity. All you need is contact paper and painters tape. Both of which can be found at the dollar tree (my most favorite store!). Tape a piece of contact paper on the wall with the sticky side out. Gather any random or theme based objects to stick to the wall. These can include, paper scraps, tissue paper, shapes, flowers, animal cut outs, beads, etc. This is a fun activity for the youngest to the oldest little ones.

Friday, May 3, 2013

Jelly bean graphing

My little one sure did love this activity! We got it here.http://www.2teachingmommies.com/2011/04/easter-sneak-peek-and-some-of-our-week.html

Monday, February 25, 2013

Bird houses


We took advantage of a great deal at JoAnn craft store and bought these cute little wooden birdhouses for only $1 each! We just used the paint we already had at home. Now the boys are excited to hang them out on the trees as soon as the storms pass.  

Sunday, February 10, 2013

Construction vehicle pretend play

Here is a fun and easy idea boys and girls would love. Just set up a box/planter or just a rocky or dirt area in your backyard and bring out the construction vehicles. We bought several of these at the dollar store. Gather a few large rocks, pebbles and even some sticks for the kids to play.


Thursday, January 3, 2013

Number Hop

I made numbers using painter's tape on the tile floor. Then I would call out a number and my little one hopped from one to the next. Great way to release energy and practice number recognition. Next time we may even try to do some adding or putting down some letters for letter and sound recognition. Great activity for a chilly inside day!

Thursday, December 20, 2012

Tin Foil Christmas Ornaments

 You will need:
A recycled cereal box
foil
cookie cutters or stencils
tape
glitter glue
hole punch
ribbon

1. Trace Christmas shapes using your cookie cutters.
2. Cut them out and cover with foil and secure with a piece of tape on the back.
 3. Have your little ones decorate the ornaments using glitter glue.
4. Punch a hole at the top or your ornament and put a ribbon through the hole and tie it.
5. Hang your new creations on the Christmas tree!

Monday, November 19, 2012

Bento Box Picks


My sister sent my little ones these adorable bento box picks. They are just so cute! They made snack time extra fun! She also uses them for lunch time in those cute little plates for poaching eggs. They make great compartments for little diced up food. 


Friday, November 16, 2012

Beginning Sounds Balloon Game

You will need: two ballons, a sharpie, minimal artistic skills

Blow up two balloons. One one write letters, and on the other draw pictures of things that start with that letter sound. 

To play throw the balloon with the letters up in the air and have your little one catch it. Have him choose a letter he is touching when he catches it and tell you what sound the letter makes. Then throw the second balloon with the drawings and have him find the object that begins with that letter sound. We began with letter A-I and then gradually added more letters and drawings. 

This was a great activity for my active boy. He wanted to keep playing and playing!


Monday, November 12, 2012

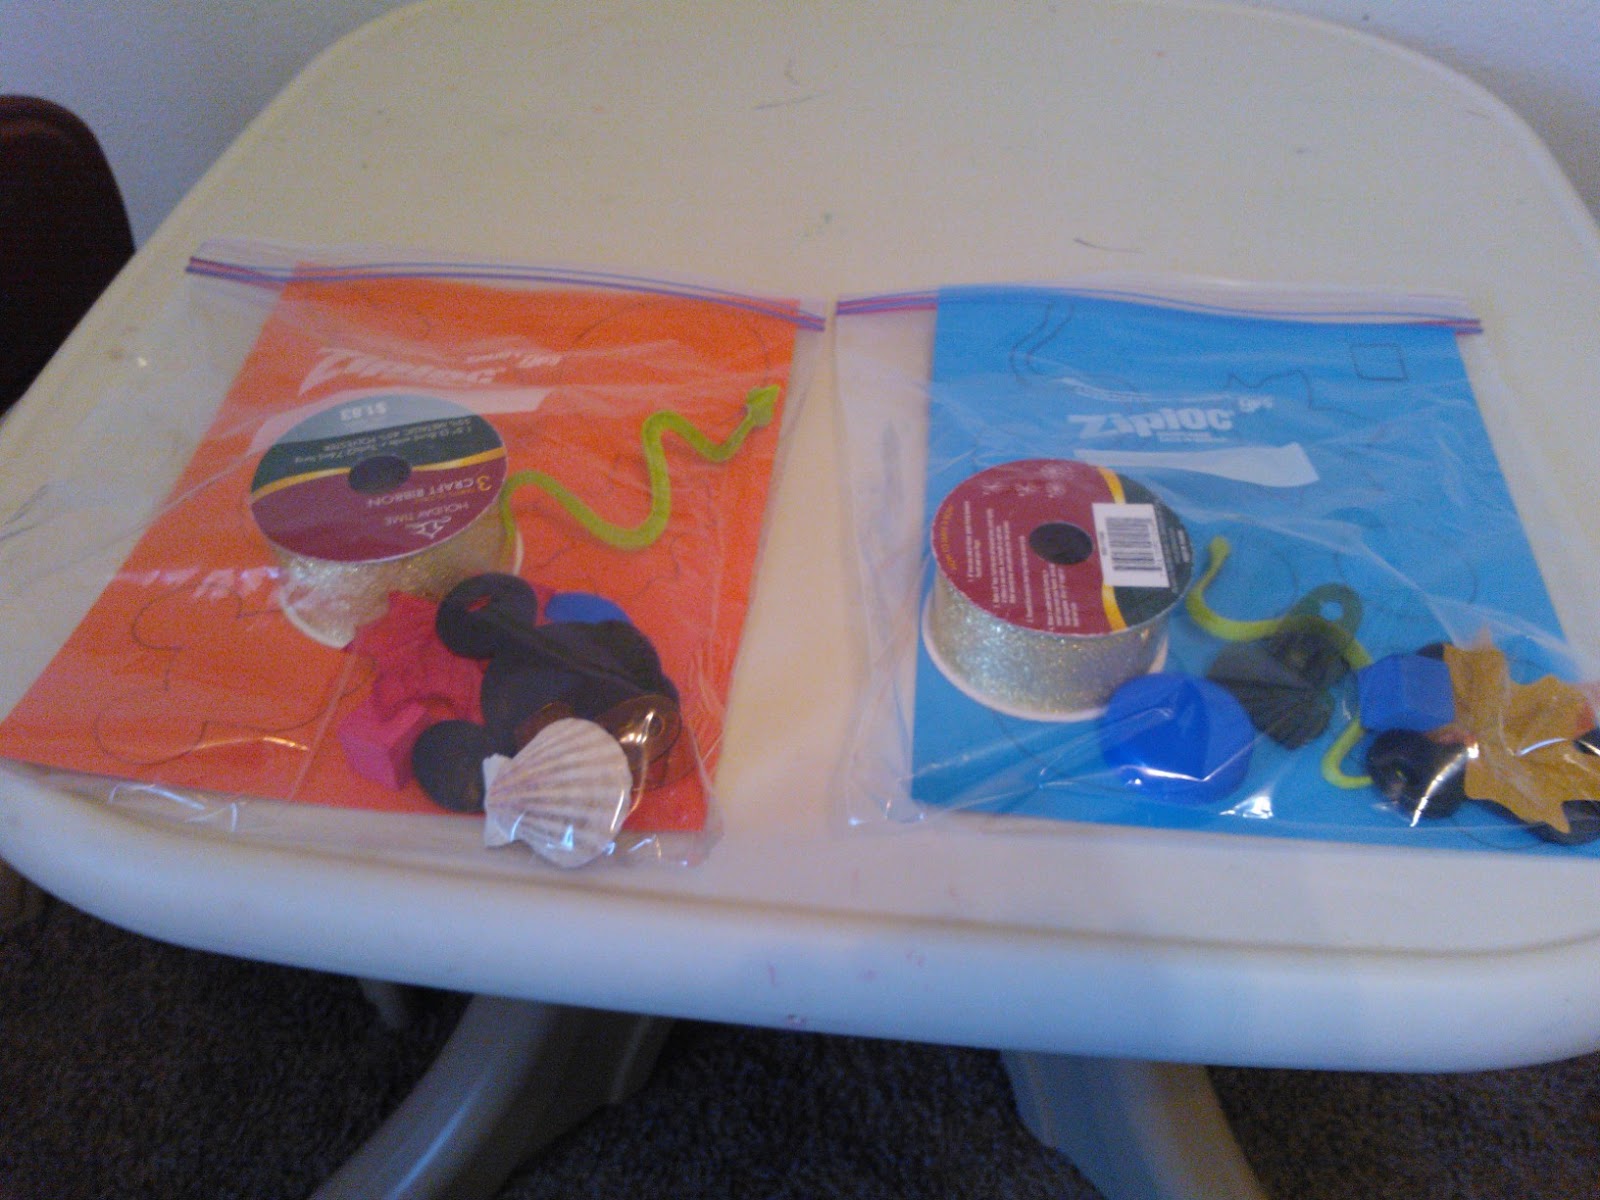
Little Pintesters: Junk Match Busy Bag

 
We love Pinterest! I recently pinned THIS activity and threw it together in less than five minutes with stuff I had lying around the house.

They're called Junk Match bags. You pretty much grab an assortment of small objects you have around your house, trace them on cardstock and put them all in a gallon ziploc bag. That's it! Easy! Then have your little ones match the object to its outline.

Outline all the random objects

Place them in a large ziploc bag. You may need to trim the cardstock a little bit to make it fit.
 
Let your kids have fun!

This is probably the easiest activity to put together!
TIP: The cardstock can be laminated to make it last longer.

We give it a BIG 10!

Here are some more ideas to make this activity even more fun and educational:
  • Make themed bags for holidays with small holiday objects from the Dollar Store
  • Make alphabet bags each with objects starting with a certain letter for practicing letter sounds
  • Bags can be themed around shapes or even color
Please let us know in the comments if you try this activity and if you come up with more fun ways to use it.
 

Thursday, November 1, 2012

Falling Leaves ABC Game


You will need: 
Construction Paper
Scissors
marker
Basket

I made 26 leaves by cutting construction paper and wrote upper and lower case letters on each leaf. Then I gave them to my little one and had him throw the leaves and high as he could. He loved that part! He then made sure all the letters were facing up. I would call out a letter and he would put it in our little basket. Then we would talk about what words began with that letter sound. Great game for letter recognition and sound recognition. 

Wednesday, October 31, 2012

Little Pintesters: Toilet Paper Tube Fun!


Here are two activities you can make using empty toilet paper or paper towel tubes.

The first one is a fun game my boys absolutely loved. Found HERE. You take the tubes and cut them up into different sizes and you tape them onto a cookie sheet or tray. Then you take a small ball and the kids have fun tilting the tray and making the ball go through the "tunnels." To make it more complicated you can add more balls. FUN!
Our Score: 10

The second activity found HERE (This a great website if you're teaching your preschooler at home). You take six tubes and cover them with colored paper. Then you glue them onto a long piece of cardboard or cardstock and onto each other. I used a glue gun and it worked very well. You label each tube with its corresponding color. You can have your little ones sort all kinds of objects. We've used popsicle sticks, pompoms and beads so far.
Our Score: 10
 
The best part of these activies is that they cost little to nothing to make!